
How it works
Featured routes are curated listings that appear more prominently in search results and on the map. They can be used by management agencies to highlight attractive features of a park, drive visitation to a lesser-known area, or provide unique experiences for certain types of users (bird watchers, wheelchair-friendly trails, etc).
We highly recommend you consider including featured routes on your lands to provide a better experience to users planning a visit.
Review this example of a high quality Featured Route - the Picture Canyon Outlaw Loop
The list of featured routes you see in your menu is based on your followed regions.
Creating a new featured route
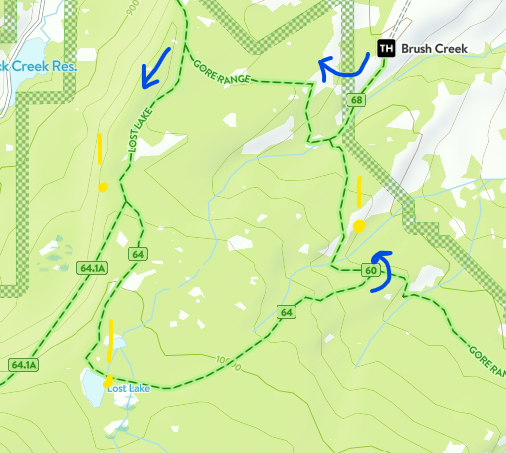
To demonstrate how to create a featured route, we’re going to use an example. We intend to create a loop beginning at the Brush Creek trailhead that visits Lost Lake in a counter-clockwise loop. While calling out the features of the lake, we also want to note a few mining ruins along the way as points of interest. This is primarily a route for hikers who want to take a moderately challenging hike to a lake.
Our planned route
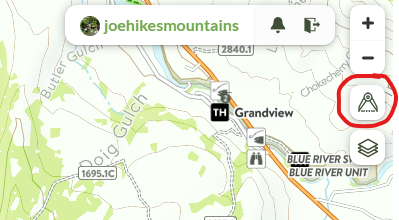
- Use the Measure Tool in the top right corner to create a custom route. Much like the ‘trail line’ closure tool, clicking along a trail will wrap to the contours of the trail.
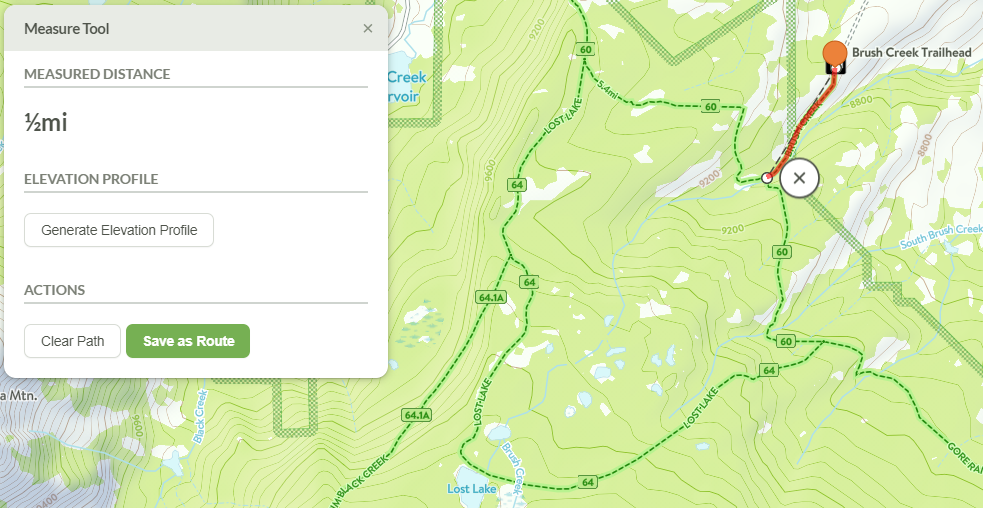
- Save the route and add an activity type (you can edit the route later to add more activity types as needed).
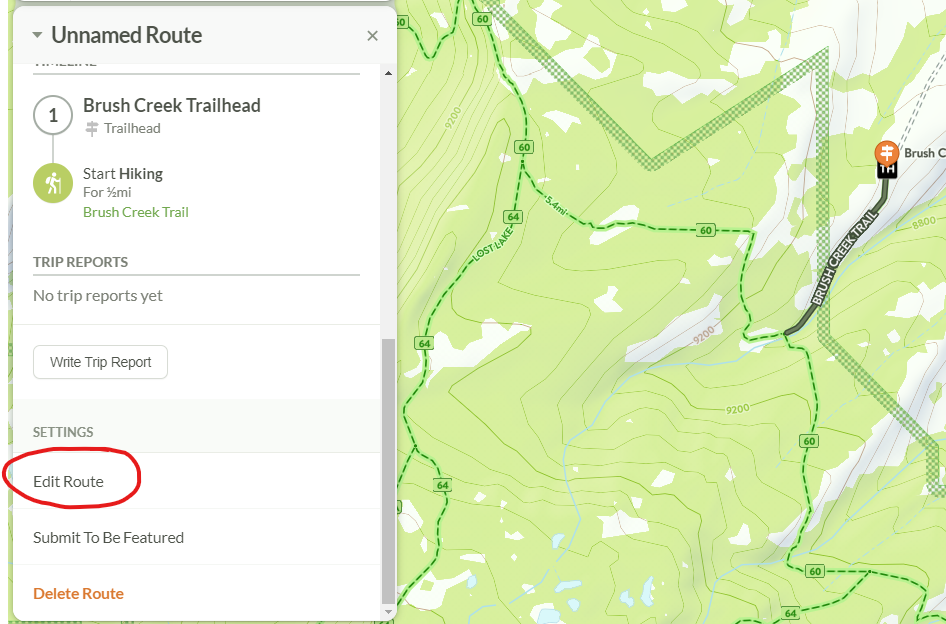
- Scroll to the bottom of the newly created “Unnamed Route” and click “Edit Route” (we’ll come back at the end to click “Submit To Be Featured”)
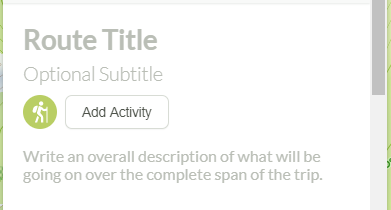
- Add a title, optional subtitle, activity type(s), and overall description of the route. The activity type is a category users can select when searching for new trips, so ensure it’s properly categorized!
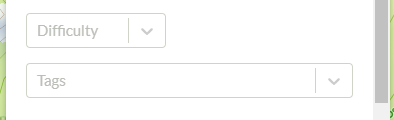
- Add a difficulty rating and any appropriate tags. Difficulty rating and activity tags are also filter options for users when they’re searching, so these are important fields. You can enter multiple activity tags.
- Set the appropriate visibility for the route.
- Public - Visible to all users in search results and on the map. Routes must be set to “Public” before being submitted as a Featured Route.
- Private - Visible only to you, the user who created the route. You can use this to save and return to your route later.
- Unlisted - Visible to anyone with a URL link to that route, but does not show up in search results or on the map.
- Only People Tagged - Visible only to those users who you have tagged (which is the next field on the form). We don’t recommend using this for Featured Routes.
- SKIP tagging people - this is primarily used by the public when sharing custom routes between friends.
- Add photos - these photos will appear alongside the general description of the route.
- Create the rest of your route and add points of interest along the way. We’re now ready to build out the bulk of the Featured Route on the map, including any points of interest along the way.
- Left click on the map to create or extend a route segment.
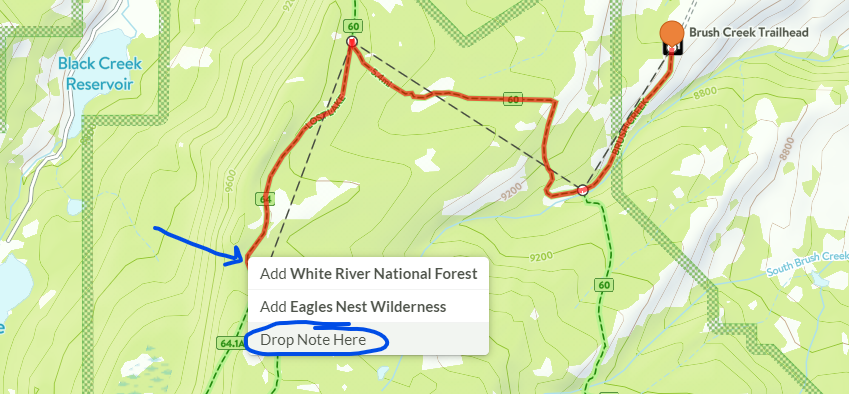
- Right click and click “Drop Note Here” on an existing trail segment to create points of interest.
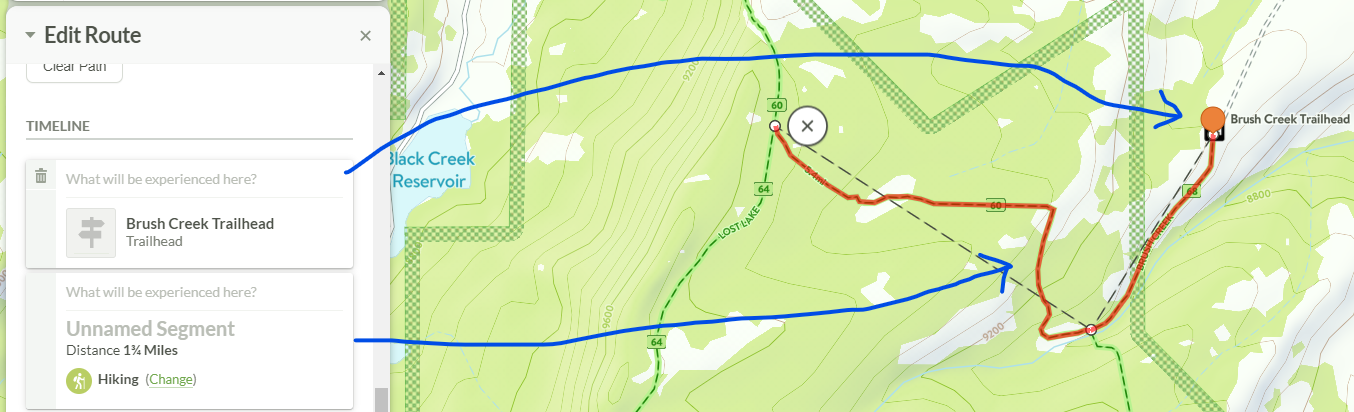
In the example below, a point of interest (the trailhead is always a point of interest when creating a new Featured Route) is indicated by the orange marker, and the segment is indicated by the red line along the trail contour.
In the example below, we first left clicked to extend the southbound segment of trail beyond the north western junction, then right clicked where the blue arrow points, near where our segment ends, and clicked “Drop Note Here”.
- Title your note - the title of your note will display on the map and on the timeline. Ignore the classification (this is used for other types of notes) and ensure the visibility is set to “Public”. You’ll have an opportunity to describe this point of interest in more detail on the next step.

In our example, we now have two points of interest and a route segment.
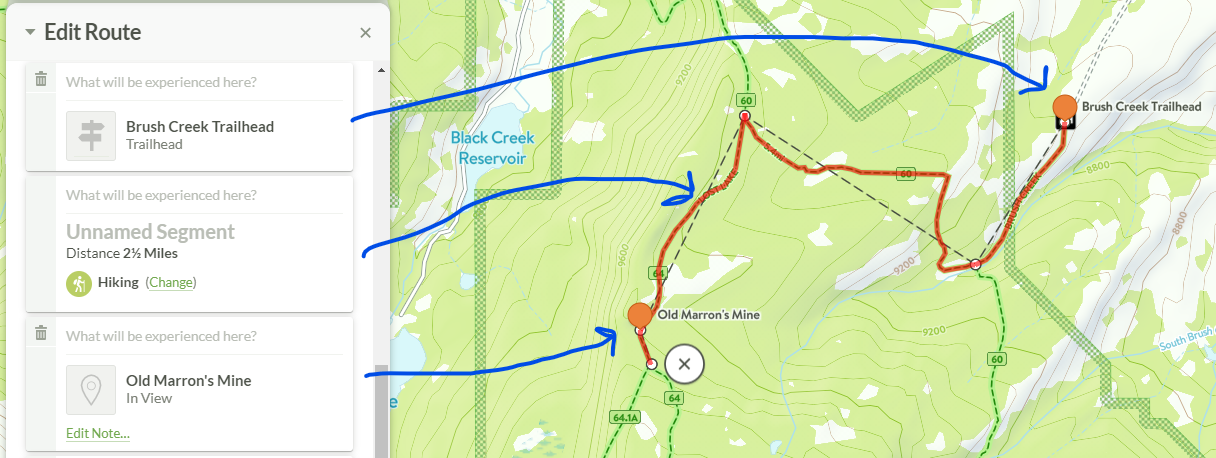
- Write a brief one-sentence description for each point of interest describing what the visitor is likely to see here. Include the trail segments as well - “...hike through a dense pine forest before coming to a clearing…”
- Continue to place points of interest and route segments until you are finished.
Depending on your route, you can include existing map features as a point of interest. In our example below, after creating the route segment to the lake, we right clicked on the lake itself to place a point of interest that will include the ability to view pre-populated information about the lake. Existing assets appear as an option when dropping a new note on or near the asset.
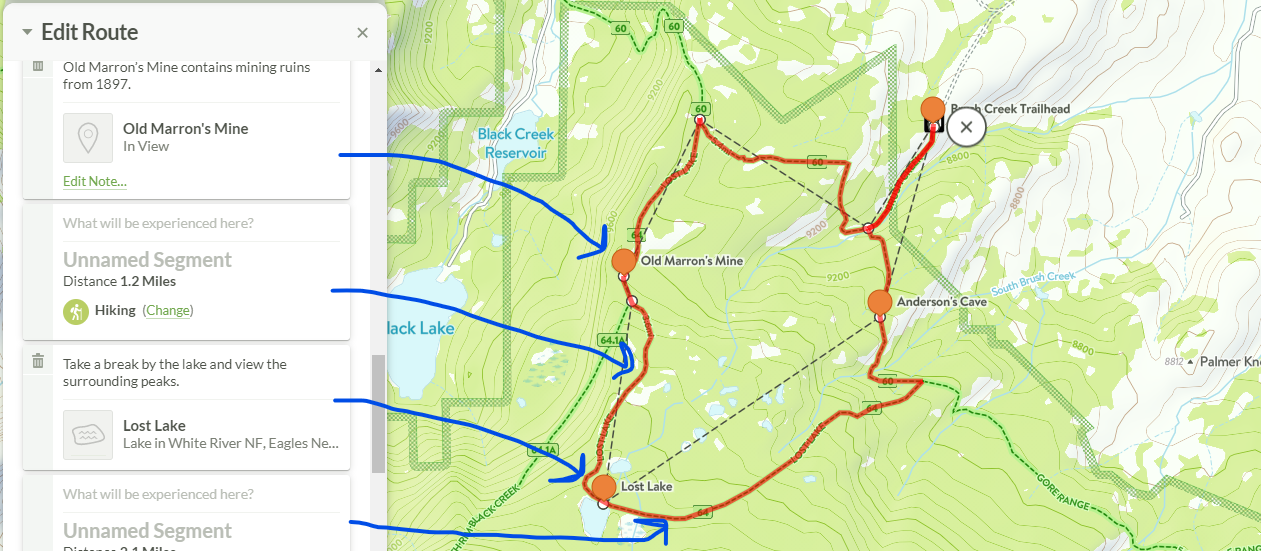
- Skip the “Add Attraction” button - this is for other custom routes, not Featured Routes.
- Save your route (at the top of the form) - COTREX does not support auto-saving, so always ensure you save your route to ensure you don’t lose progress.
- Review your route, and edit any notes as appropriate. You can click on each point of interest (note) you created and edit them individually to include more in-depth descriptions and photos of that point of interest. Make sure you always set your notes to “Public” visibility if you want them to appear in your Featured Route.
Our finished example route. This is how the route will look to the public once it’s live.
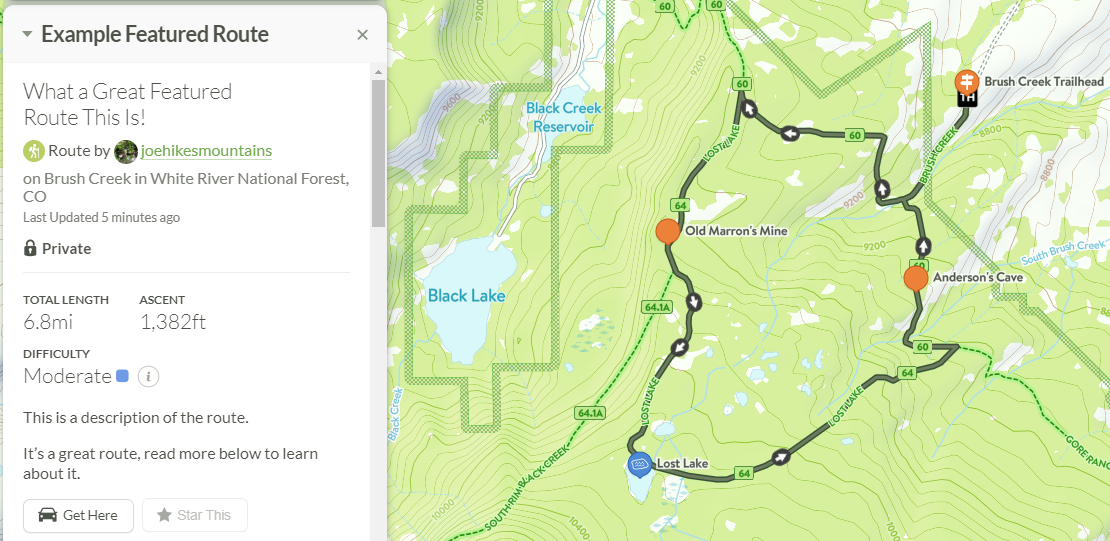
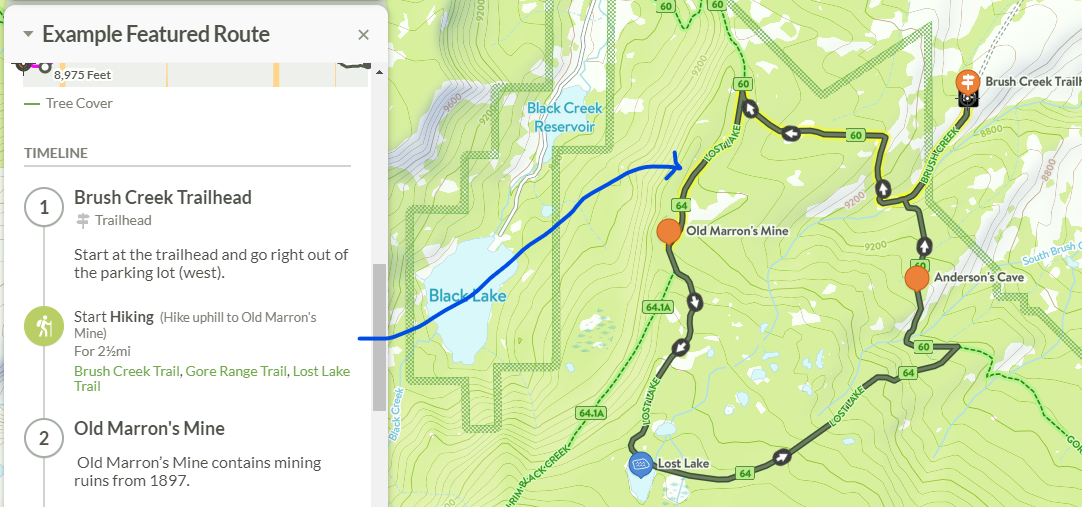
Note that users can hover over each segment of trail or point of interest in the timeline to see it highlighted on the map. This allows visitors to see a step-by-step experience before they visit.
- Once you’re happy with your Featured Route, scroll to the bottom and click “Submit To Be Featured”.

- A member of the COTREX team will review your Featured Route, and will reach out to you via email to finalize any necessary details. Once your route is officially approved, it will appear in relevant search listings and when the public browses your lands on the map.